
Recording Drums in Logic Pro With Online Drum Studio's Bob Irving
- Bob Irving

- Apr 21, 2021
- 5 min read

As a remote recording session drummer I’m recording myself a lot. As I write this on a Saturday I have recorded 4 sessions this week alone which is amazing! From singer songwriter sessions, pop to noise it’s always good to have a solid starting point. That’s why I’m going to run you through how I set up my session in Logic Pro, and how to then save that session as a template that you can recall each time you start tracking. I’ll even include my own template as a free download!
A short video on my YouTube walking you through the process
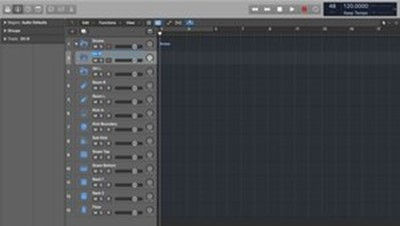
1 - Track labelling and icons
Firstly, you can see I clearly have all my tracks named and have a corresponding icon which I find to be a quicker reference. You can change your track names by double clicking on the existing track name or by going to the Inspector > Track. You can change the icon by right clicking (or control clicking) the existing icon or by also going to Inspector > Track and clicking on the existing icon.
Track Name Option 1
Track Name Option 2

Change Icon Option

Change Icon Option 2

I also like to assign my input names. This option is found under Mix > I/O Labels. This can be useful if your inputs don’t all run in sequential order. For example, I currently have 12 mics on my kit running through 2 interfaces. Interface 1 is inputs 1-8 but interface 2 is inputs 11-18. Labelling my I/O means that I won’t forget which input corresponds to which drum. Colour coding is also fun, but can start to look a bit crazy if you’re not careful!

You can label your I/O for clearer picture of your inputs, if they don’t change often!
2 - Track stack and drum bus
All of my drum tracks are set up in a drop down folder which helps keep the session really clean. Sometimes a client want to send me their session, record in my drums and send the whole session back. If I can send it back with all my drums recorded and laid out nice and tidy, that’s a win for both myself and the client. In Logic this is called a track stack (specifically a summing stack) and it’s really useful as it creates a drum bus as well as the drop down folder. This gives you the ability to get a good mix of the drums with levels and panning, and be able to control the overall drum volume with a single fader. It also means you can use effects such as reverb or compression on the whole drum mix versus each individual channel. This helps reduce the load on the computer as well as giving you some extra control. You can of course use any plugins you want on individual channels but you want to try and reduce using multiples of the same plugin where you can. To create a track stack, highlight the tracks you want to be included in the stack, and simply press Shift Command D. With the tracks highlighted you can also go up to Track>Create Track Stack.
Open Track Stack

Flattened Track Stack

Drum Bus

3 - Grouping for multi edits
I have been loving using takes in Logic but I was having to manually change takes for each track - I knew there had to be an easier way! Once I found out about multi edit grouping it was a real game changer for me. The way to do it is to group the tracks and then enabling editing. Highlight the tracks you want and in the mixer click the group section. You can also name the group, I have just named it “drums” and you can toggle any of the settings on or off. Personally I only have Editing, and Arm Record. This lets me arm all the tracks with 1 click instead of arming each individual track, and enables me to jump all tracks between multiple takes with only one click. If you ever want to group feature off a quick Shift G toggles it off and back on. This saved me a lot of time and I hope it does for you too!
Highlight the tracks you want to group

Group all the tracks

Rename and adjust settings

4 - Channel Strip Settings
If you’re new to mixing one great feature of Channel Strip Settings is the ability to load in default settings. Pull up the mixer, click on settings up the top of the mixer and all the way at the bottom you have your defaults. You can see all the different ones here which can give you a great starting point. You’ll notice this was on the drum bus channel. I haven’t been able to get these same default to show on the individual channels so my current workaround for that is to copy and paste the channel settings over to the correct channel and then save that setting as a preset. It’ll now be saved to your presets for any session you’re working in and you won’t have to do this again.
Master Bus Channel Strip Presets

Copy The Channel Strip You Want

Paste On To The Correct Channel

Save To Your Presets

5 - Customise Control Bar & Display
When I’m recording for multiple clients, the sessions are always at different tempos and move between different sample rates. I wanted to quickly see the sample rate of the session so I could be sure I was tracking at the right rate for my client. To customise this you go up to the control bar and click the drop down menu next to the LCD display. From here click on customise control bar and display. Make sure LCD is set to custom. You can see I have my LCD displaying only the sample rate, tempo and performance meters. Click save as default and now each time you select custom it will load in your custom defaults. Leave it set to custom for the next step. You can also reduce clutter on your screen by removing buttons and options you don’t use. It really helps to have a clean workspace.
Find the drop down menu

Customise to suit your needs

Set to Custom

6 - Save as a Template
After all this work, you don’t want to forget to save your work as a template so you can recall this exact set up whenever you need to! You need to make sure that Advanced Tools is enabled. Go to Preferences > Advanced and make sure Show Advanced Tools is toggled on. Also, since you have your awesome new template you can even make Logic show your templates on opening. In Preferences > General and set the Startup Action to Select A Template.
Preferences > Advanced

Toggle Show Advanced Tools ON

Set Select A Template as the Start-up Option

Conclusion
I’ve played around inside Logic for HOURS now so I hope this does save you some time, and if you want to save the most time just download and start using my free Logic Pro template.
And when you need some drum tracks to fill up that template don’t use midi for goodness sake! Give us a shout at Online Drum Studio and we will sort you out with some killer drum tracks! #downwithmidi
If you’ve got any Logic Pro tips be sure to leave them in the comments below!

Hi, I’m Bob and I’m the session drummer that runs and operates Online Drum Studio. I’m a Berklee College of Music graduate and I’m passionate about all things audio! I’ve worked as a drummer on cruise ships for 5 years and now I’m really excited to be helping artists, musicians and producers with Online Drum Studio.
Head to Online Drum Studio if you want professional quality bespoke acoustic drums for your tracks! Songplistic has partnered with Online Drum Studio and we can produce any track with Bob's fantastic drumming! Check Online Drum Studio out at: https://onlinedrumstudio.com


Comments